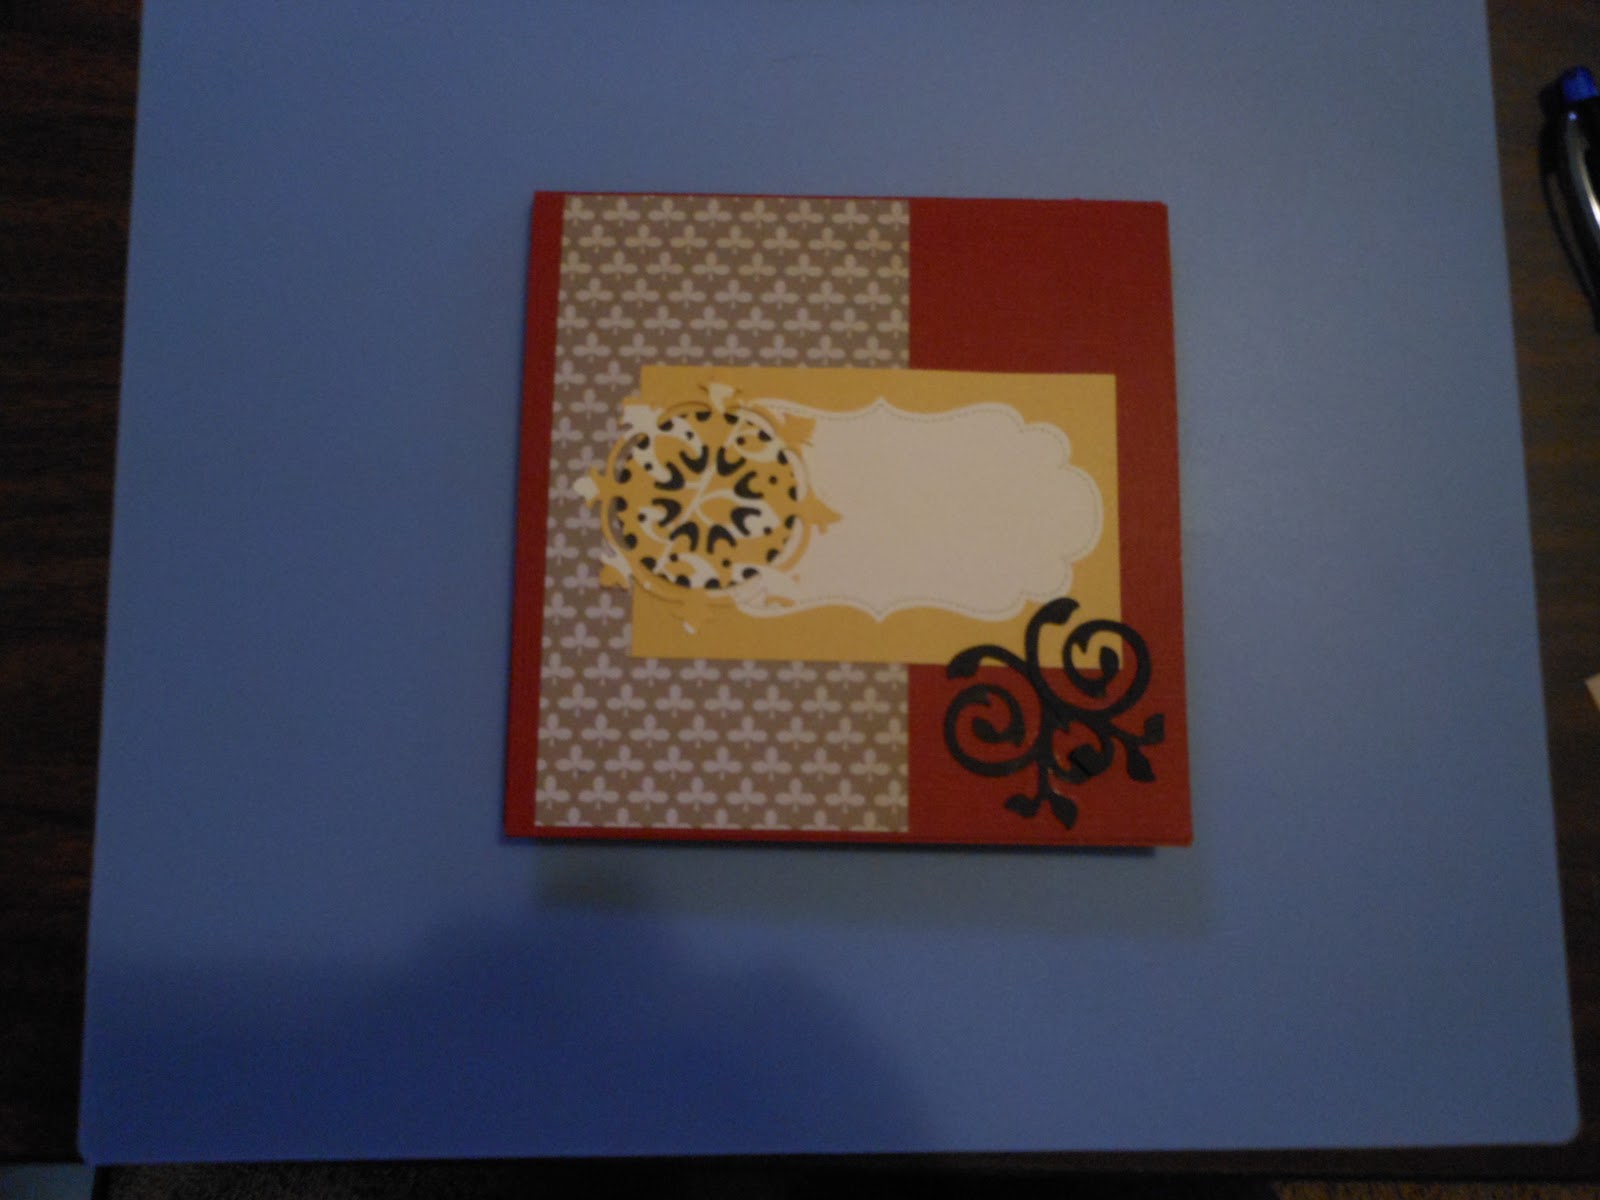
Tuesday, June 17, 2014

Beach Fun


Beach (noun) A place of relaxation, rest, and tranquility 


Having fun playing with Karen Burniston's new Katie Label Accordion.   

For this project I used Katie Label Accordion, All - Seasons Tree, Graphic 45 By the Sea Collection.  The stamps are By the Tide from Stampin' Up

Using pictures of my grandsons at the beach.  To create the coral I used a branch from the All - Seasons Tree.  I used a Copic markers to give the sea animals stamps just a little color.

Tuesday, May 20, 2014

Karen Burniston Card Challenge "Fly"

The word is "Fly" - How will you interpret it?

The first thing that came to my mind was the saying "wouldn't you love to be a fly on the wall?" 
I decided to design a card with two friends chating in a coffee shop.


Supplies:
Karen Burniston's Lucky Label Pop Up and Accordion Fancy Label from her Pop It Ups collections
Art Impressions - Coffee BFF
Prima - Cling Mounted Stamps #551056 (fly)
Distress Ink - Vintage photo and gathered twigs
Memento - Tuxedo Black
Stampin' Up - Morning Cup Stamp
My Favorite Things Stamp - Western Backgrounds
Bazzill Paper - White, Wheat, thick plastic
Authentique - Promise three
Copic - BV000,BV01,BV02,RV42,E11,E13,E17,E25,E47,E57,YR24,YR27,B39,B45,C5,R17,BG02

 Coffee BFF was stamped using Tuxedo Black onto Bazzill White.  Colored with Copics

Cut Bazzill white 10 3/4 x 4 1/2, stamp bottom using the wood grain stamp from My Favorite Things. (Vintage Photo ink), cut  Promise three 4 1/2 x 5 3/8.  Attach Promise three as wall paper of the coffee shop.  Cut think plastic 4 x 4 1/2, then cut lucy label using thick plastic piece.  I made a little alteration to Lucy label.  Cut a little off each side of the label.  Lucy Label was attached to card using red line tape, the attach BFFs using your favorite glue.  Next I attached the Coffee Shop sign using foam squares, then fly was stamped.  Front of card: Cut Wheat 4 1/4 x 5 1/4, cut Promise three 1/2 x 4 1/4. Morning cup was stamped on a scrap of wheat and fussy cut.  Morning cup is attached using mini foam squares.

I hope you enjoyed my little fly on the wall card.  All supplies (except stampin up stamp) were purchased at Scrapp'n Savvy in Spring Texas


Tuesday, May 6, 2014

National Scrapbook Day - Pride Layout


Take pride in how far you've come and have faith in how far you will go.
                                                                           -Christian Larson 


Materials:
Bazzill Basics Paper - Cream Puff 5 3/4 x 3 3/4 (4), 4 3/4 x 3 5/8(1) , Steel Blue 12x12 (2)
Authentique - Pride Collection: Triumph 12x12 (1), Foundations 12x12 (1), 4x6 (4)
Your favorite brown distress ink (Vintage Photo was used )
Pride Collection Sticker sheet: Quote, Banner (3)
8" Natural Jute

*Cut 1/4" off all for sides of the Triumph, Cut 1/2" off of top and one side of the Foundations


Disclaimer:  Picture has decided to turn when uploaded into blog.

Ink all paper (optional)
Adhere Triumph to Blue Steel
Quote will have blue border.  Trim to your liking.  On this layout it was trimmed to the red line.
Adhere Cream Puff 5 3/4 x 3 3/4 to Foundations (red side) 4 x 6 to make photo mat
Adhere two photo mats and quote to Triumph. Refer to picture for placement.


Disclaimer:  Picture has decided to turn when uploaded into blog.

Ink all paper (optional)
Adhere Foundations to Blue Steel
Adhere Cream Puff 5 3/4 x 3 3/4 to Foundations (red side) 4 x 6 to make photo mat
Cream Puff 4 3/4 x 3 5/8 is for journaling
Adhere two photo mats and journaling mat to Foundations.  Refer to picture for placement

Tie a knot on side of jute, place on page at desired link tie knot on the other side.  Adhere banner sticker to jute on page. (the banners will hold jute onto page)  Refer to picture for placement.

Hope you enjoyed this project.


Materials purchased at Scrapp'n Savvy


Thursday, April 10, 2014

Bluebonnets

"Bluebonnets are to Texas what the shamrock is to Ireland"

I love this time of year, Spring is in the air and the Bluebonnets are in full bloom.  Since I cannot find the time this year to go to the hill country and take pictures of the Bluebonnets.  I decided I would play with a few of my new die cuts and make a card. 


 I wanted to play with my new Die Cuts, Wink of Stella brush, Bazzill paper and Authentique Paper.  When I see bluebonnets I always think of the country and what better thing says country than a picket fence.  I was inspired by a Facebook post from Karen Burniston, Designer, Karen showed how Karen Aicken used the post from her Lots of Pops Pop-Up die to make the fence.  So I thought I would try it out.


Supplies:
Karen Burniston's Lots of Pops Pop-up Die Cut, Garden Bench Pop-Up Die Cut, All-Seasons Tree Die Cut, Katie Label Pivot Card Die Cut
Deadbeat Designs's Bluebonnet Die Cut
Tim Holtz's mini bunny die cut
Distress Ink - Shabby Shutters, Distress Ink - Vintage Photo
White Pigment Ink pen
Wink of Stella Brush - White
Zig 2 Way Glue Chisel Tip
Scrappy Glue
Authentique Foundation One paper - cut to 6" x 12"
Authentique Elegant Three paper - cut to 6" x 12"
Bazzill - french vanilla, white, blue bell, blue jean, hillary, sugar daddy


To make the inside of the card I used Foundation One paper from Authentique.  For the fence to pop I used the pop-up die twice.  Aligning the center of the pop-up die over the fold about a 1/4 inch from the left and then again the left side of the die cut is lined up on top of the far left side of the first die cut. Please see below for placement.


You will need to fold it a little different than normal. The ends and middle are folded in ward the two little ones on the top and bottom are folded in ward.  The big sections are folded out ward.  This will create a shelf or in this case two shelves side by side.


I then cut out 9 posts from the Lots of Pops Pop-Up  Die. Then I ink it using Vintage Photo distress ink.  Cut two strips 1/4" x 4 1/4" these are used to hold spaced out posts making the fence. The Bluebonnets and bunny were attached to the fence prior to the fence attached to the pop-up.

Bluebonnets: cut two large out of Bazzill Blue Jean and three out of Bazzill Blue Bell, Bluebonnet leaves cut out of Bazzill Hillary. White ink pen and Winks was used on Bluebonnets for accent. Attached Bluebonnets using scrappy glue and  pop dots on some of the Bluebonnets to/ give some dimension.
Grass: cut out of Bazzill Hillary using the grass die cut Garden Bench Pop-Up die set, used versa marker on some of the leaves to make them darker.
Bunny: cut out of Bazzill Bling Sugar Daddy (this paper makes the bunny look like a choc bunny)  Purple is my favorite color so I had to add a purple bow. :)  Now set the completed fence aside.

Clouds: cut two large and two small out of Bazzill White using the clouds from the All-Seasons Tree Die Cut

Before adhering the Pop-up part of the card to the outside of card.  Cut around 1/4" on the sides and top of the top portion of  pop-up card.  with this being done now the blue lace from the outside of the card will show.  The bottom of the pop-up card was inked with Shabby Shutters Distress ink with a little Vintage Photo added close to the pop-up to give the grass and dirt look.

Ribbon was added to the front of the card.  When attaching the inside to the outside the ribbon was tucked in between the top section of the inside to the outside card.

Once you have the inside and the outside attached then the fence is added.  The clouds were attached using pop dots. To attach fence to pop-up base on card. Adhesive was only added to the bottom part of the posts. using a tape runner.

Used a little play on words for the salutation.  "Everybunny looks good in Bluebonnets"  printed it and then used the large decorator label out of the Katie Label Pivot Card die cut.

Now that we have the inside done lets move to the outside of the card.  Cut one small Bluebonnet out of Bazzill Blue Jean and two small Bluebonnets out of Bazzill Blue Bell.  Leaves out of Bazzill Hillary. Use your favorite adhesive to adhere to the front of the card.  I used Scrappy Glue.

I hope you enjoy making this card as much as I did.
  
Supplies I used for this project were all purchased at Scrapp'n Savvy in Spring Texas.


Sunday, April 6, 2014

Scrapp'n Savvy April Die Cut Club Make & Take Sneak Peek


Here is a sneak peek of the die cut club make & take this month at Scrapp'n Savvy.   We will be using the new dies from Deadbeat designs.  If you have not already pre-ordered your dies it is not too late. If you  have already ordered them I will have them set aside with your name on them.  This month we will be using the Bluebonnet dies from the collection.  I thought I would put out a list of supplies I used if you do not have a certain item you may purchase it at Scrapp'n Savvy. After April 14th I will blog the instructions on how to make the project.
 Supplies:  Vintage Photo Distress Ink, Black Ink, Wink of Stella brush - White, Wink of Stella brush - Gold, Copic E15, E17, YR24, YR27, VersaMarker, Zig-2 way glue and 3D foam squares and basic scrapp'n supplies.

This Saturday, April 12th I will hosting Scrapp'n Savvy's all day crop 10:30am - midnight.  Do you have a project that needs to be completed?  Please call and reserve your seat.  It is $45.00 lunch and dinner are included plus scrapp'n with your friends and all around good time.  Lunch will be a lovely rotisserie chicken salad served on a croissant with side salad, fruit.  Dinner will be a surprise with Bundtini in assorted flavors for dessert.


Saturday, February 15, 2014

Creative Challenge


“Think left and think right and think low and think high. Oh, the thinks you can think up if only you try” – Dr. Seuss


I am what you might call a craft shopaholic.  I looked around my craft studio and took inventory of all the die cuts and stickers that I have.  At first I thought book you purchased a certain die that it could only be used one way. Oh and if you purchased at a scrapbook store then it only could be used for scrapbooking.  


To my amazement I started playing around with different ideas.  Let me just say die cuts are not just for scrapbooking or card making. Now do not get me wrong I love to make cards especially pop up or cards that have movement.

Let me show you the fun that I have been having lately.


 So I got to thinking what could I make using Shimmer Sheetz, Die Cuts, metal, faux flowers and a planter box.  


 I made dragonflies using Elizabeth Craft Designs Small Dragonfly die cut, Shimmer Sheetz, and springs.  the butterflies I used Karen Burniston Butterfly Accessory Dies (a part of her new collection with Elizabeth Craft Designs), Shimmer Sheetz, small metal jewelry items.


With the cold days we have been having lately here in Texas, I guess I must have Spring Time on my mind.  
I had purchased some Gelato Colors and had only used them once or twice.  Let's just say that is about to change.  I had so much fun playing with different textures on this project.  I also have all this tissue paper left over from Christmas gifts. ( Look Honey I found something to do with my stash)  On this project I used the Gelatos, tissue paper, water, Mod Podge, Elizabeth Craft Designs peel off stickers, can you tell I love the dragonfly and butterfly die cuts.  The dragonflies are made with Shimmer Sheetz and Bazzill paper, the butterflies are made with Shimmer Sheetz that I embossed and their bodies are mad with bazzill paper, Transparent double sided adhesive.  Using the adhesive I was able to use the silk microfine glitter to give their little bodies a little glitz.  The bees wings I used Shimmer Sheetz.  Next to making the background I think making the flowers was one of my favorites.  The flowers are Peel-off stickers adhere to Bazzill white paper.  Found a new way to use my distress inks either the pad or markers and a water brush pen.  I like the watercolor look.  So yet another way I can use my markers and ink pads.  I love it when I can use a product for more than just one way. I feel like I have used my money wisely.  


This was a fun card to make.  What I like about this die is that you can make as many as you would like.  what I mean is do you only want two ovals or do you want more.  So you can use this die to make a card or a banner.  I decided to make a card.  I am into Shabby Chic and Country.  It must be the Texas Girl in me.   When I make a card it normally is not just made of paper.  Note on this card I have burlap under the boots on the front and I have rope on the back of the card.  I used Karen Burniston's Oval Flourish Frame Edges die to give it a little bit of lace look.


My family thought that I was crazy this year.  I did not wrap my Christmas gifts with Christmas wrapping paper.  I used regular brown shipping paper.  I decided to devote my time into the tags. For a make n take project 
(tag in the upper left hand corner) I used Bazzill card stock and Elizabeth Craft Designs Ornament Set 2 die.  Note the middle ornament has a little bit of dimension to it.  I adhered several ornaments together to get the effect of an old fashion ornament I would see on my Grandparents Christmas tree. The tag in the lower right hand corner I once again used the Transparent double sided adhesive so I could add the silk microfine glitter.


Go Texas Mini Album


I admire bull riders for their passion and the uniqueness each one of them has.
 ~Chris LeDoux


I recently took part in a Lickety Slip page swap  " Go Texas Mini Album" at Scrapp'n Savvy.  Thought I would share my layout and instructions.

Supplies:
Moxie Paper Line - Western Round Up and embellishments
Bazzill Card Stock - Mud Pie, Kraft, Curry Spice, Cajun
Star Plastic
Favorite Ink - I used Distress Ink Vintage Ink
Score tape
Favorite adhesive for small items
Tape Runner


Cut two 4 x 6 from Wagon Train (note wood grain is horizontal)

Cut one 3 3/4” x 3 3/4” square from Kraft
Cut one 1” x 3 3/8” from burlap print
Cut three 1/2” x 3 3/8” from Mud Pie, Score in 1/2
Cut three 3 3/8” x 3 3/8” square from Mud Pie
Cut one 3 3/8” x 3 3/8” square from Star plastic
Rodeo, Rodeo shadow and Bull Rider - used Silhouette Cameo
Cowboy Hat and Boots are from Embellishments


Cowboy Hat and Boots have been fussy cut
Rodeo was cut out of Curry Spice using Cameo
Rodeo Shadow was cut out of Mud Pie using Cameo
Attach Rodeo to Shadow using your favorite adhesive. Then attach
to center of 4 x 6 Wagon Train
Attach Cowboy hat tilted on O.  Attach boots in the left lower corner.
I have slightly tilted them.


 Attach the 3 3/4” x 3 3/4” Kraft square on the right side leaving
about 1/8” of inch border on right side and top and bottom. 
Attach Bull Rider to the lower left hand corner of the 4 x 6 Wagon Train
using your favorite adhesive. Bull horn may overlap the photo mat.


 Mini Album: you will need the three 3 3/8” x 3 3/8”  Mud Pie square and three 1/2” x 3 3/8” Mud Pie.  Using score tape adhered to the back side of the 1/2” x 3 3/8”.  Taking one of the 3 3/8” x 3 3/8” square then adhere 1/2 of the 1/2” x 3 3/8” to the top of the square. Fold the rest of the 1 /2” (non sticking side down) take the second 3  3/8” square and place on top of folded 1/2” . The second piece of 1/2” x 3 3/8” adhere to top of 3 3/8” square you just adhered. Fold the rest of the 1/2” (non sticking side down) take the third 3 3/8” square and place on top of folded 1/2”.  The third piece of 1/2” x 3 3/8” adhere to top of the 3 3/38” square you just adhered.  Fold the rest of the 1/2” (non sticking side down). Now you will adhere the Star plastic to the 1/2” x 3 3/8” piece.  The burlap paper will be adhered to the top and folded over to the back.  This should give it the book binding effect.


 Place Bull Rider layout in page protector.  Then adhere mini book to the outside.  Center the mini book to be in the center of the Kraft square.


Top Layout:
Kraft  - cut one 3 1/2” x 3 3/4” , cut two 2 3/4” x 3 1/2”
Mud Pie  - cut one 3 1/8” x 3 3/8”, cut two 2 5/8” x 3 3/8”
Wagon Train - cut two 4 x 6 orange side up
Adhere Cowboy to Cowboy shadow using your favorite adhesive. Adhere 3 1/8” x 3 3/8” Mud Pie to 3 1/2” x 3 3/4” Kraft.  Adhere 2 5/8” x 3 3/8” Mud Pie to 2 3/4” x 3 1/2” Kraft  then repeat.
Adhere large photo mat to the left side of the 4 x 6 Wagon Train leaving about 1/8” on left side and top and bottom.   Adhere Cowboy to right side. (see above for placement)
Adhere the other two photo mats to the second piece of the 4 x 6 Wagon Train.  There is about 1/8” border on the right side and left side, a little over 1/8” boarder on the top and bottom.


Monday, November 7, 2011

What's New with me


With the holiday season coming upon us I have been busy on the visual team with Pottery Barn in the Woodlands.

With my creative genes working I have been working on my traditional scrap-booking and card making using Karen Burniston's diecuts.
Outside of Flip-up Flower
Inside of Flip-up Flower with flower close

Inside of Flip-up Flower with flower open

Outside of Floating Frames

Inside of Floating Frames

Outside of Friendship

Inside of Friendship (zig-zag insert)

Outside of Chandelier "Phantom of the Opera"

Inside of the Phantom of the Opera
 Also hosted a baby shower at my house. Here are some of the items I made for the shower using the Cricut.

Borrowed some of the ideas from Pinterest.com
Cupcakes made by Cakes by Jules, Thankful Tree in the background also an idea from Pinterest.com


Food Spread created by the hostesses.


Tuesday, March 22, 2011

Missing Tominac Fitness Center

Once you learn to quit, it becomes a habit.
-Vince Lombardi

I have to say Vince Lombardi said it best.  I have managed to get out of my exercise route and it is hard going back.  I got on the scale today and about died from a heart attack.  I did not weigh this much when I was pregnant with either one of my boys. (okay I know that was almost 22 years ago).


Before I left Savannah I was in the habit of going to Tominac Fitness Center (gym on Hunter Army Airfield) I had a great trainer plus it was free. :)  After my workout I would then go walk the Savannah Squares with my daughter in-law and grandson.  It really does not feel like you are exercising when you walk in Savannah.  There is so much to see it takes your mind off of the fact that you are working out.  I would always lose track of time and think I was only walking for maybe a hour and the next thing I knew it had been walking for four or five hours.  When I worked downtown it was even better because I always took the stairs in the office building and parking garage. 


I now I live back in Texas not close to a military post so no more free gym for me.  Now my husband keeps reminding me of the lovely gym we have in our subdivision that is included in the HOA fees.  It is nice but I still do not have the free trainer.  Then there is the Biggest Loser game I just purchased last Friday for the XBox 360 Kinect. It is so much easier to come up with excuses not to exercise but reality is I only have 43 days to lose 30lbs. I have to get to my ideal weight before JK's graduation from The Citadel.  Wish me luck... :)

Wednesday, March 16, 2011

Houston Rodeo Time


It has been a long time since Mike and I have been to the Houston Livestock Show and Rodeo. The last time we went the Rodeo was still in the Astrodome and George Strait rode in on his horse. It was kind of sad seeing the Dome looking so empty and in bad shape. Does anyone remember when you had to get up early to be the first one in line to purchase tickets(because you wanted the best seats)? Now you just go online or pull up an app to purchase them.


My Christmas present this year was Chute Seat tickets for the night Sugarland was performing. If you are going to go to the Rodeo that is the way to go. I was two rows up from the actual chute. You can watch the real cowboys in their Wrangler jeans (don't tell Mike I said that) prepare to ride. It brought back memories of when I use to watch my Dad during his Rodeo Clown days.(too young to have seen him bull ride) I am not one of those people who just goes for the music entertainer that is performing that night . I like all the events from the Horse Cutting to the calf scramble. My favorite event is of course the Bull Riding Event. Although it was nice sitting on the dirt with our folding chairs watching Sugarland. (note the guitar pick in the picture above) Kristian Bush threw it out towards some young girls. They missed it and I got it LOL


This year was also special because we were able to take our youngest grandson Tre. ( would have been even better if Aaron was here too). I had so much fun going to Cavender's with Tre getting him ready for the Rodeo ( thought Mike was going to kill me once he saw the bill) Tre was so excited about his John Deer Boots and George Strait hat and of course his Big Texas belt buckle. The first time he walked with his boots on, you would have thought he just got off his horse from a long Texas trail ride. We tried to get a picture of him on the Longhorn but he would have no part of that. ( maybe we can pull that off this summer at my Dad's) He loved looking at all the animals. His favorite was the chickens, gee I wonder why I guess because he is use to them from visiting my Dad who has Tyson chickens.

I will end this post with cowboy Tre singing.


Wednesday, March 2, 2011

Cancer $@(&$

I talk to him when I'm lonesome like; and I'm sure he understands. When he looks at me so attentively, and gently licks my hands; then he rubs his nose on my tailored clothes, but I never say naught thereat. For the good Lord knows I can buy more clothes, but never a friend like that. ~W. Dayton Wedgefarth


First I would I like to apologize for my bad word. I could not find another word to describe it.

A couple of days ago we learned that our 7 year old lab Gretchen has Lymphoma.

The "typical" canine lymphoma patient is a middle-aged dog brought to the veterinarian because one or more lumps have been found. The veterinarian rapidly determines that all of the peripheral lymph nodes (those near the skin surface) are enlarged and firm. Usually the dog has not been showing any signs of illness. The next step is a blood panel and urinalysis to more completely assess the patient's health and one or more lymph nodes are aspirated or biopsied to confirm the diagnosis of lymphoma.

It is believed we caught it early and with treatment she will live another 1 to 2 years. Without treatment she would only live maybe another 4 to 6 weeks. My question is why do you even think about if we are going to have your beloved animal go through treatments or not. Yes I know the treatments will cost us up to $5,000.00. My youngest son is in his last year at the Citadel and my oldest son just left to go over seas. The thought of them not being able to say goodbye to one of their best friends just breaks my heart. Gretchen is also so good with my grandsons and loves running with her Daddy. Tre loves feeding, playing fetch, and hugging her. How do you tell a 2 year old?

When my Mother was diagnosed with IBC stage 4 back in 2006 I did not even give her a chance to say she did not want treatment. I pick up my cell phone and got her the best doctors in Savannah. My Mom was 76 years old she had lived a full life. She had great accomplishments in her life she was one of the first Medical Navy Waves(what they called females during Korean War), first female pharmaceutical rep (she worked for Smith Kline and French) and these are just the ones I know about but I was not ready to let my Mom go. Now remember she was at stage four and chemo treatments for humans is not pleasant by any means. She did not have her get up and go like she use to and she was always nauseated after treatments. Thank goodness we had great insurance because her treatments were very expensive over $10,000.00 a treatment. With this being said the treatments only gave me one more year with Mom. Yes a year that I am grateful for but was I wrong in having her go through that. Then when the cancer moved to the rest of her organs and she was moved to Hospice. It was so sad watching someone who was so intelligent go to not making any sense in what she was saying. But yet you could see it in her eyes that she knew she was not making sense and could no longer communicate. So now comes to my second question why do we let our love ones live in such pain? When our animals get to where they cannot function we give them meds and let them go to sleep and out of pain. Why don't we do that for those that have done so much for us? I really hate these questions and having to come up with answers. I know I am not suppose to question GOD but sometimes I just wonder how strong he really thinks I am. Mom waited until I was in church the response was "I have asked and you have answered me" I knew she had gone to Heaven that very moment.

After much thought and research we have decided to have Gretchen go through treatments. Everything we have read stated she will be the same. She will be able to run with Mike and play fetch with Tre. Still give me a hard time about wanting to be on the furniture. She had her first treatment today.

To decide is to walk facing forward with nary a crick in your neck from looking back at the crossroads. ~Betsy CaƱas Garmon

Thursday, February 24, 2011

Once Asked

Several weeks ago I asked how I felt about my son maybe working for HPD or becoming a cop else where. Without hesitation I said "I am ok with it, it cannot be any different from being a military wife, mother and mother in-law." My thought process is that they love this country and what a great honor it is to protect what we believe in. Now I would be lying if I said I do not worry about them. In regards to my son and daughter in-law that our serving our country. I know they are with highly trained soldiers.
This morning I must admit I thought about the question again. The words "Special Report: HPD Officer Shot" first I prayed for our friends who are HPD Officers. (update the Officer is doing fine and is asking if he can go back to work now. He was shot in the arm and hip) The news was showing the ambulance going to Memorial Hermann. The freeways were still a little crowded with people heading downtown to work. As I watched news footage I wondered 1) why didn't they call LifeFlight? 2) why aren't these people moving out of the way? My husband who is now a Lifeflight pilot said think about it this way that if the Officer was in really bad condition they would have been called. So look at it that he is going to be ok. Still watching the news they showed the hospital and it was surrounded with HPD (on motorcycles, on foot, in car and on horse) This reminded me of our military family and we surround each other in good times and and bad times. I feel better now and I will be very proud to wear the name tag saying "Proud Mom of a Soldier and Police Officer"

Sunday, November 30, 2008

Catching Up Yet Again

Okay it appears that I can only update my blog once a month. I need to get better at this. I have been with my hobbies (sewing and photography)which I wouldn't mind if either of them turn into a job. I am still in the beginner stage of the photography. I will need to practice more before the grand baby arrives. MDM is still wishing a would find a cheaper hobby because what comes with photography but Photoshop to make that really good picture even better. Once you have that really great picture you must scrapbook. (Creative Memories is my new best friend) I have taken up scrap booking due to I have a ton of pictures from family going way back in time. Some are labeled and some are not. I made a promise to myself that when you open open one of albums you will not wonder "who are these people" and "what are they doing". enough on that....
As you know from my past post my oldest JR is now married to Ang and are expecting. JK is still in school. MDM is still a army pilot and working all the time. To keep myself busy I have joined the Hunter Wives Club and I am the publicity chair, still working at the quilt store (to support my sewing habit), in three bunco groups, driving people crazy taking pictures. I am torn between using Creative Memories software and Photoshop for scrapbooking. I am attaching some recent pictures.
This is my Uncle Eddie(photographer) talking to the "hired" photographer for my cousin's wedding.
This is my cousin Donna. She is practicing her knitting. I wish Mom was here to help her. Watching Donna work on this project reminded me of when Mom was trying to teach me how to knit when I lived in TN. She kept telling me I was doing a great job however it was just not my thing. I wish I would have paid more attention to her.
This is my cousin Kim and her husband Brent. They were married this past Tuesday in FL. Beautiful sunset beach wedding.
This is JK okay you can dress him up but you cannot take him anywhere. He is supposed to be at a wedding as you can tell he is playing football with Brent's 10 year old nephew. Okay at least they waited until after the wedding.
As you can tell MDM and I love the beach.
This is our family in Savannah. As you can tell Gretchen was having some issues with wanting to stay in the picture. That is one of problems with trying to take pictures using the timer feature on your camera.
I guess I better work my Christmas projects.